Photoshop Resize Selection
In photoshop software, photo editing is one kind of creative thing for a photo editor. There are a lot of photo editing options in photoshop, among them, resize images in Photoshop is one of the important things for a photo editor. so we can go for a discussion about it with a lot of details, stay with us for knowing information about resizing images in Photoshop. Hopefully, it will helpful for you.
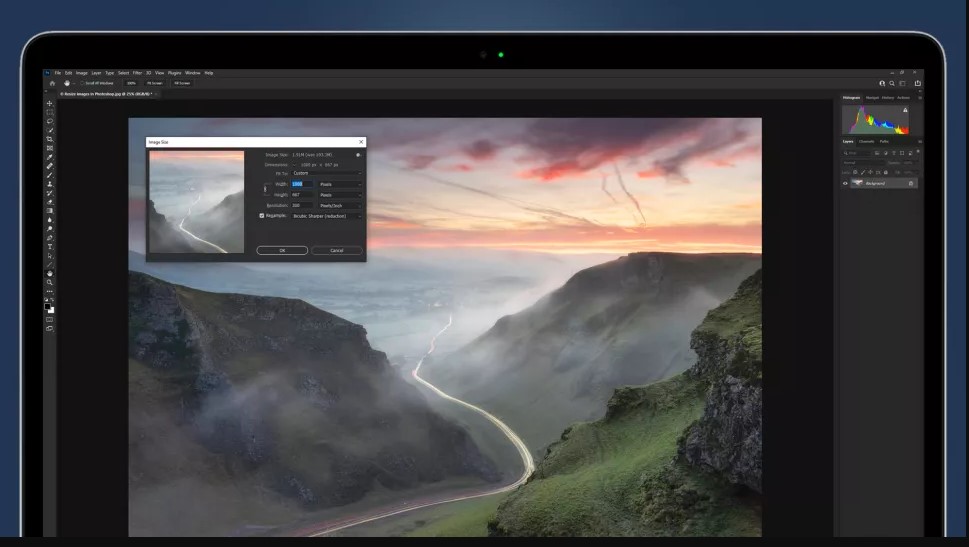
Here are discussing two things about resizing images in Photoshop, first is the reduction of image size than the increase of image size.
Reduce the size of the image
1. Check the resolution
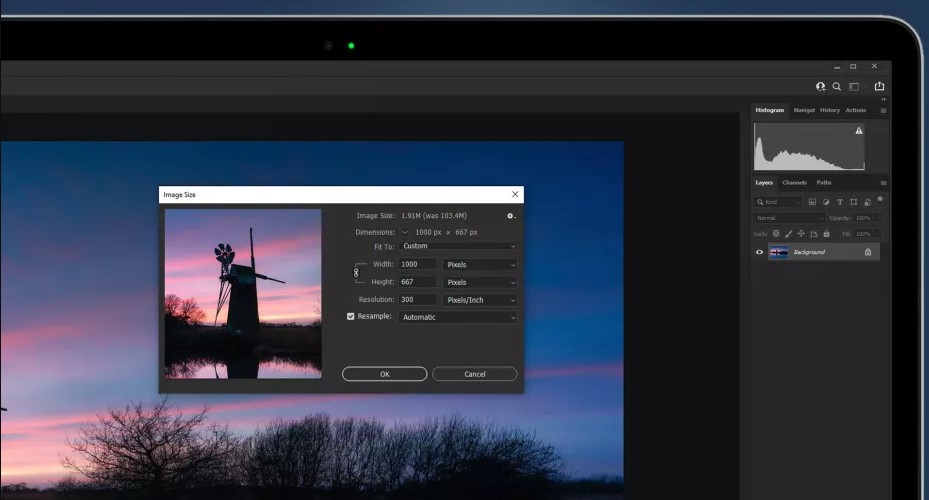
Resize images in Photoshop to Check the resolution perfectly, At first, you should go to the image, and use this shortcut Ctrl+Alt+I to open the Image size. open the Image size in dialogue then you must check the Resample box. After that, you should set the dropdown menu next to resample to automatic or bicubic sharper reduction for Next, make ensure that the desired unit of measurement is set. Then set the reduced size of the image with the longest edge
2. Set the color space perfectly.
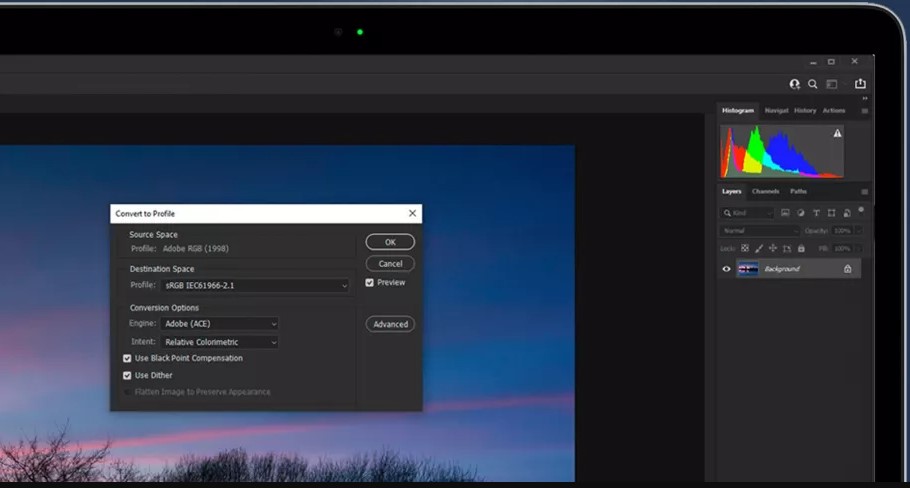
Spaces of different colorwork perfectly for different kinds of outputs, so if you want to share an image online with the best color space is sRGB, while for print it’s Adobe RGB 1998. SRGB is one kind of smaller space that is made up of fewer colors than Adobe RGB 1998, so it is best for you to save camera JPEGs or output processed with Raw files in the latter and convert to sRGB when you have the plan to share with images online for different kinds purposes.
3. Save a copy photo
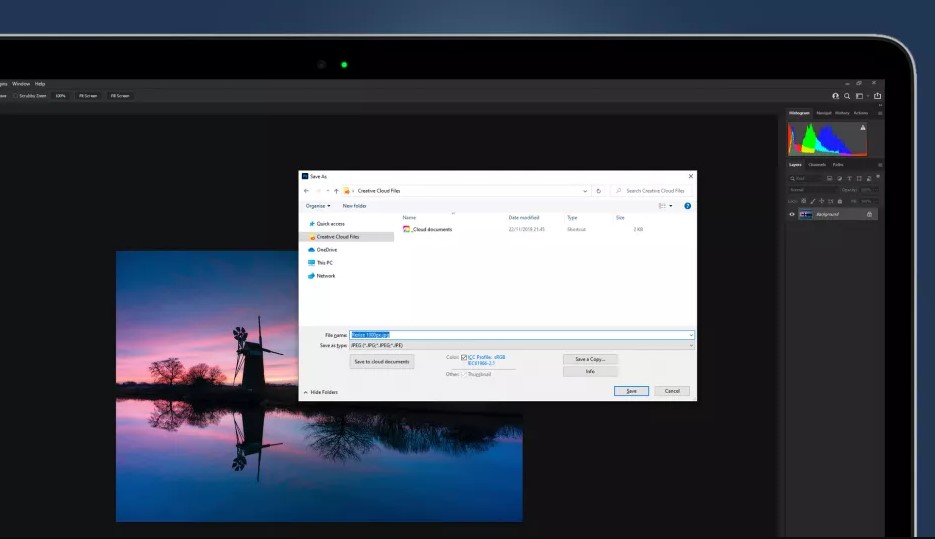
For Resize images in Photoshop, There is another important thing that Saves a copy of your photo. When resizing your photo it is best for you to save a copy so that the original image is left untouched. To Save the photo, you should use this shortcut Ctrl+Shift+S.
After dialogue opens, set your file name then Select your desired save location, the best file format will be JPEG for saving your photo.
Increase the size of the image
1. Resolution check the first
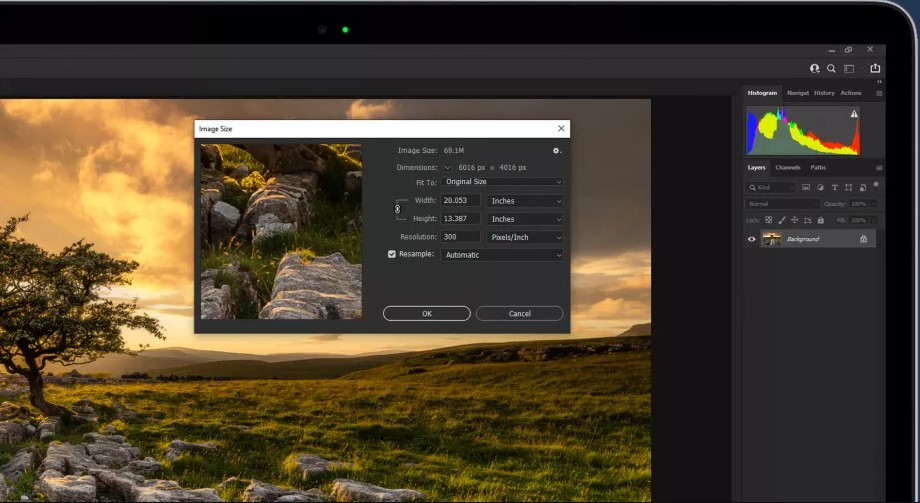
At first, you should go to then use this shortcut Ctrl+Alt+I to open the Image Size dialog and ensure that resample checking so that resolutions remain the same if width and height increase. Enlarging prints the best solution should be 300 Pixels/Inch.
2. Increase the size

Resample should be set to ‘Preserve Details 2.0’ because this produces to give the best results possible when enlarging your images. You will find amazing results increasing the images by up to 100% where detail and sharpness are should be maintained.
When increasing your photo size further, be careful that this will incrementally reduce overall image quality the higher you go.
3. Image sharpen
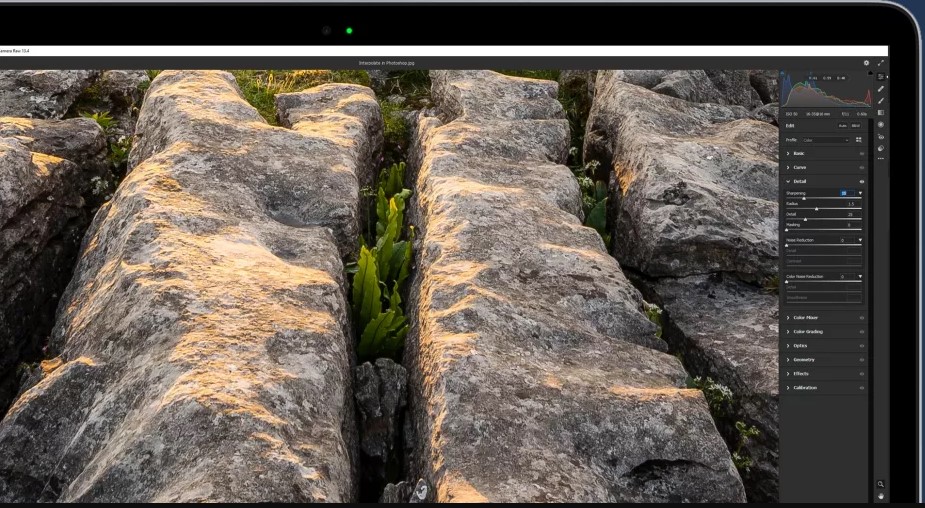
Image sharpen another important thing for resizing your photo. Enlarging your images evermore soft them slightly, for this so we can reclaim the original level of sharpness using the Camera raw filter system. At first go to the filter > filter camera raw, After dialogue opens click on the Details tab. If you are an abecedarian, you should increase the sharpening slider to between 20-40 and leave also the other sliders as the defaults. But properly know about it completely you can apply more customized sharpening.
In the ending go to the File and Save as use this shortcut Ctrl+Shift+S and save a new copy of the image as a JPEG as your desired location on your computer,
Related Tutorials

Free Building a Website for Business Promotion
Soft Gudam : In the whole world are businesses starting around online websites or web applications. So first…

The Importance Of SEO For Website
SEO Master : Have you ever heard the name of SEO (Search Engine Optimization)? Now I will discuss…

Create Custom Post Type | WordPress Theme Development
Jonh Kendra : Wordpress theme development is a very important part of the Wordpress website. In the development…

A Small Business Guide To TikTok Marketing
Anne Joseph : We all know that social media keeps on changing; no one can predict its future.…

